If you are a Shopify store owner, you’ve likely seen the warning: “Additional scripts is deprecated.” Since the arrival of the Shopify Checkout Extensibility Update, the previous methods of tracking conversions (using checkout.liquid or additional scripts) are no longer working. This breaks your data pipeline, leading to inaccurate ad reporting and wasted budget. In this guide, I will show you exactly how to solve this by setting up a custom pixel supported data layer in Customer Events.
What You Will Learn in This Guide
This is not just a technical fix; it is about securing the accuracy of your revenue data. By following this tutorial, you will:
- Understand why your old tracking setup stopped working due to Shopify Checkout Extensibility.
- Learn how to implement the “Ultimate Data Layer” directly into your theme code.
- Configure the new Shopify Custom Pixel to capture checkout data accurately.
- Verify that events like
view_item,add_to_cart, andpurchaseare firing correctly in Google Tag Manager and GA4.
Watch the full step-by-step video tutorial below:
Step 1: Install the Data Layer Snippet in Your Theme
The first step involves adding a specific code snippet to your Shopify theme files. This code prepares the data layer to communicate with Google Tag Manager.
1. Create the Snippet
- Navigate to your Shopify Dashboard:
- Go to Online Store > Themes.
- Click the three dots
...next to your active theme and select Edit code. - Scroll down to the Snippets folder and click “Add a new snippet”.
- Name the snippet:
ultimate-data-layer.
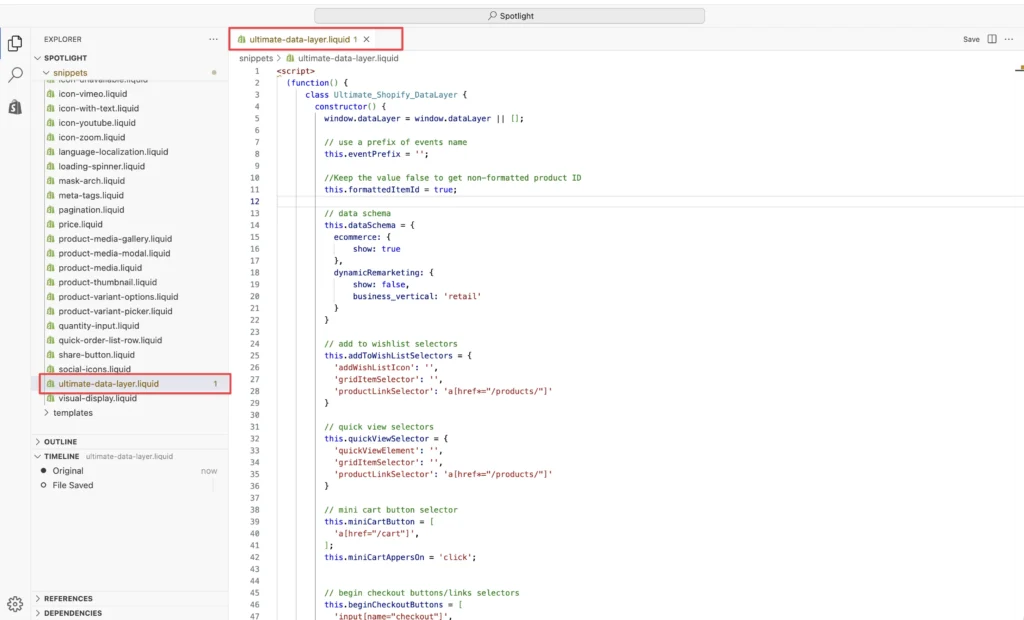
2. Add the Shopify Data Layer Code and Google Tag Manager ID
Copy the “Custom Data Layer Code” Paste this code into the new snippet file you just created.
Get the Shopify Data Layer Code
Important: Find the placeholder for the Container ID within the code and replace it with your actual Google Tag Manager Container ID (e.g., GTM-XXXXXX).
Click Save.
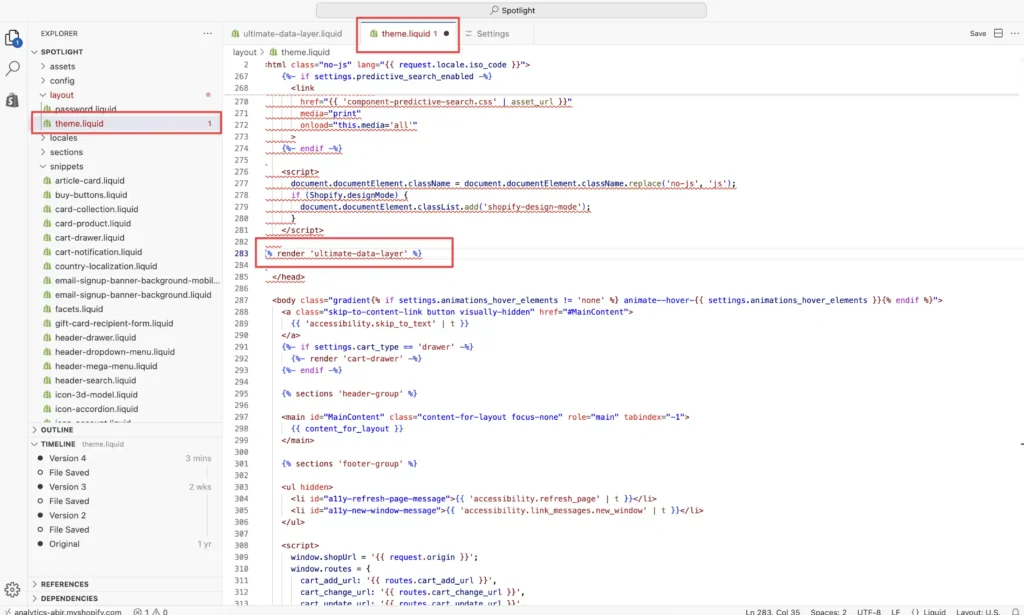
Step 2: Render the Data Layer in Theme.liquid
Now that the snippet exists, we need to tell Shopify to load it on every page of your store.
- In the code editor, find and open the
theme.liquidfile. - Locate the
<head>section. - Paste the following render code:
{% render 'ultimate-data-layer' %}. - Click Save.
Step 3: Configure the Custom Pixel in Customer Events
This is the most critical step for fixing the Shopify checkout extensibility issue. Since checkout.liquid is deprecated, we must use the Customer Events sandbox.
- Exit the code editor and go to Settings (bottom left).
- Select Customer Events.
- Click Add custom pixel.
- Name it something recognizable (e.g., “GTM-Pixel”) and click Add pixel.
You will see a code editor window for the pixel.
- Copy the “Checkout Web Pixel” code from the resource document.
- Paste it into the editor.
- Crucial: Once again, replace the placeholder ID with your specific GTM Container ID.
- Click Save and then click Connect.
If you have other pixels connected, ensure this one is active.
Feeling Overwhelmed by Code?
Messing with theme files and liquid code can be risky if you aren’t technical. One small error can break your site’s functionality or completely halt your data tracking.
If you’d rather have an expert handle this to ensure 100% accuracy without the headache, I can help.
Step 4: Verify Your Tracking Setup
Never assume your tracking works—always verify. Here is how to check if the Shopify Custom Pixel is sending data correctly.
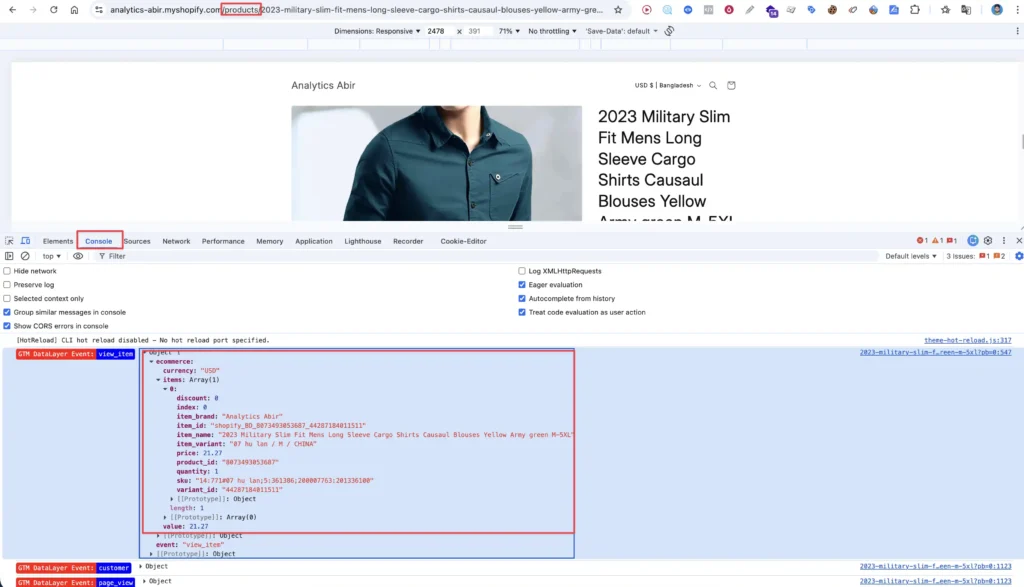
Browser Console Check
Go to your live store and perform a test:
- Open a product page.
- Right-click and select Inspect, then go to the Console tab.
- You should see events like
view_itempopulating with data (Product Name, ID, Price, Currency).
Test the Checkout Flow
Add an item to the cart and proceed to checkout. Enter test customer information. In the console, you should see the add_to_cart and add_shipping_info events firing.
[P] Note that the system captures hashed user data (email, phone) to ensure privacy compliance while maintaining tracking accuracy.
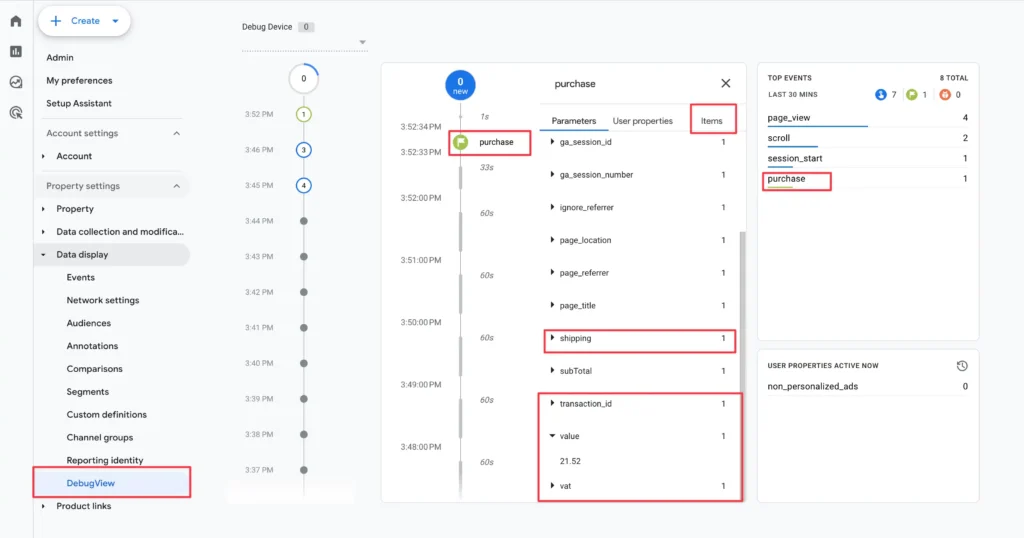
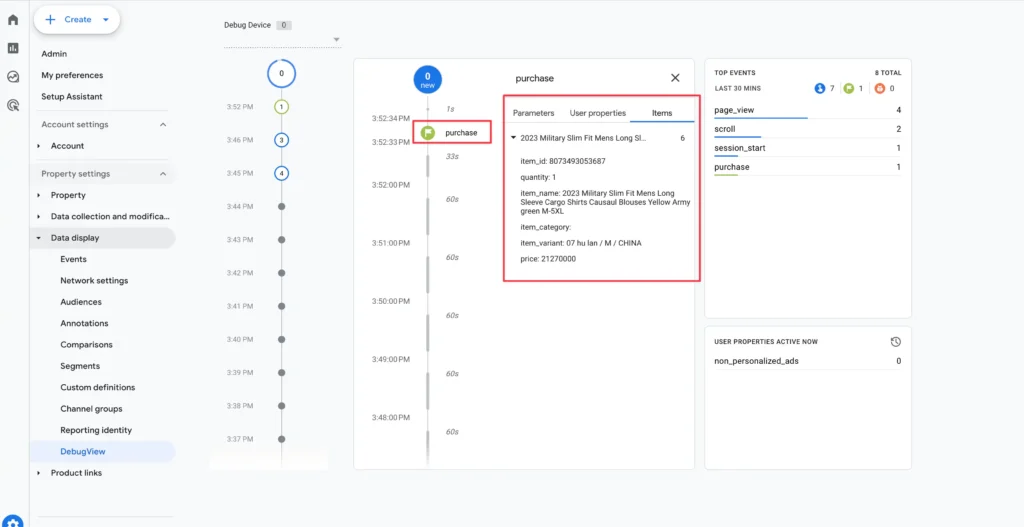
Verify in GA4 DebugView
Finally, verify the data is reaching Google Analytics 4.
- Enable “Preview” mode in Google Tag Manager.
- Complete a test purchase on your store.
- Open GA4 and go to Admin > DebugView.
- You should see the
purchaseevent appear with all relevant parameters (Transaction ID, Value, Currency, Shipping).
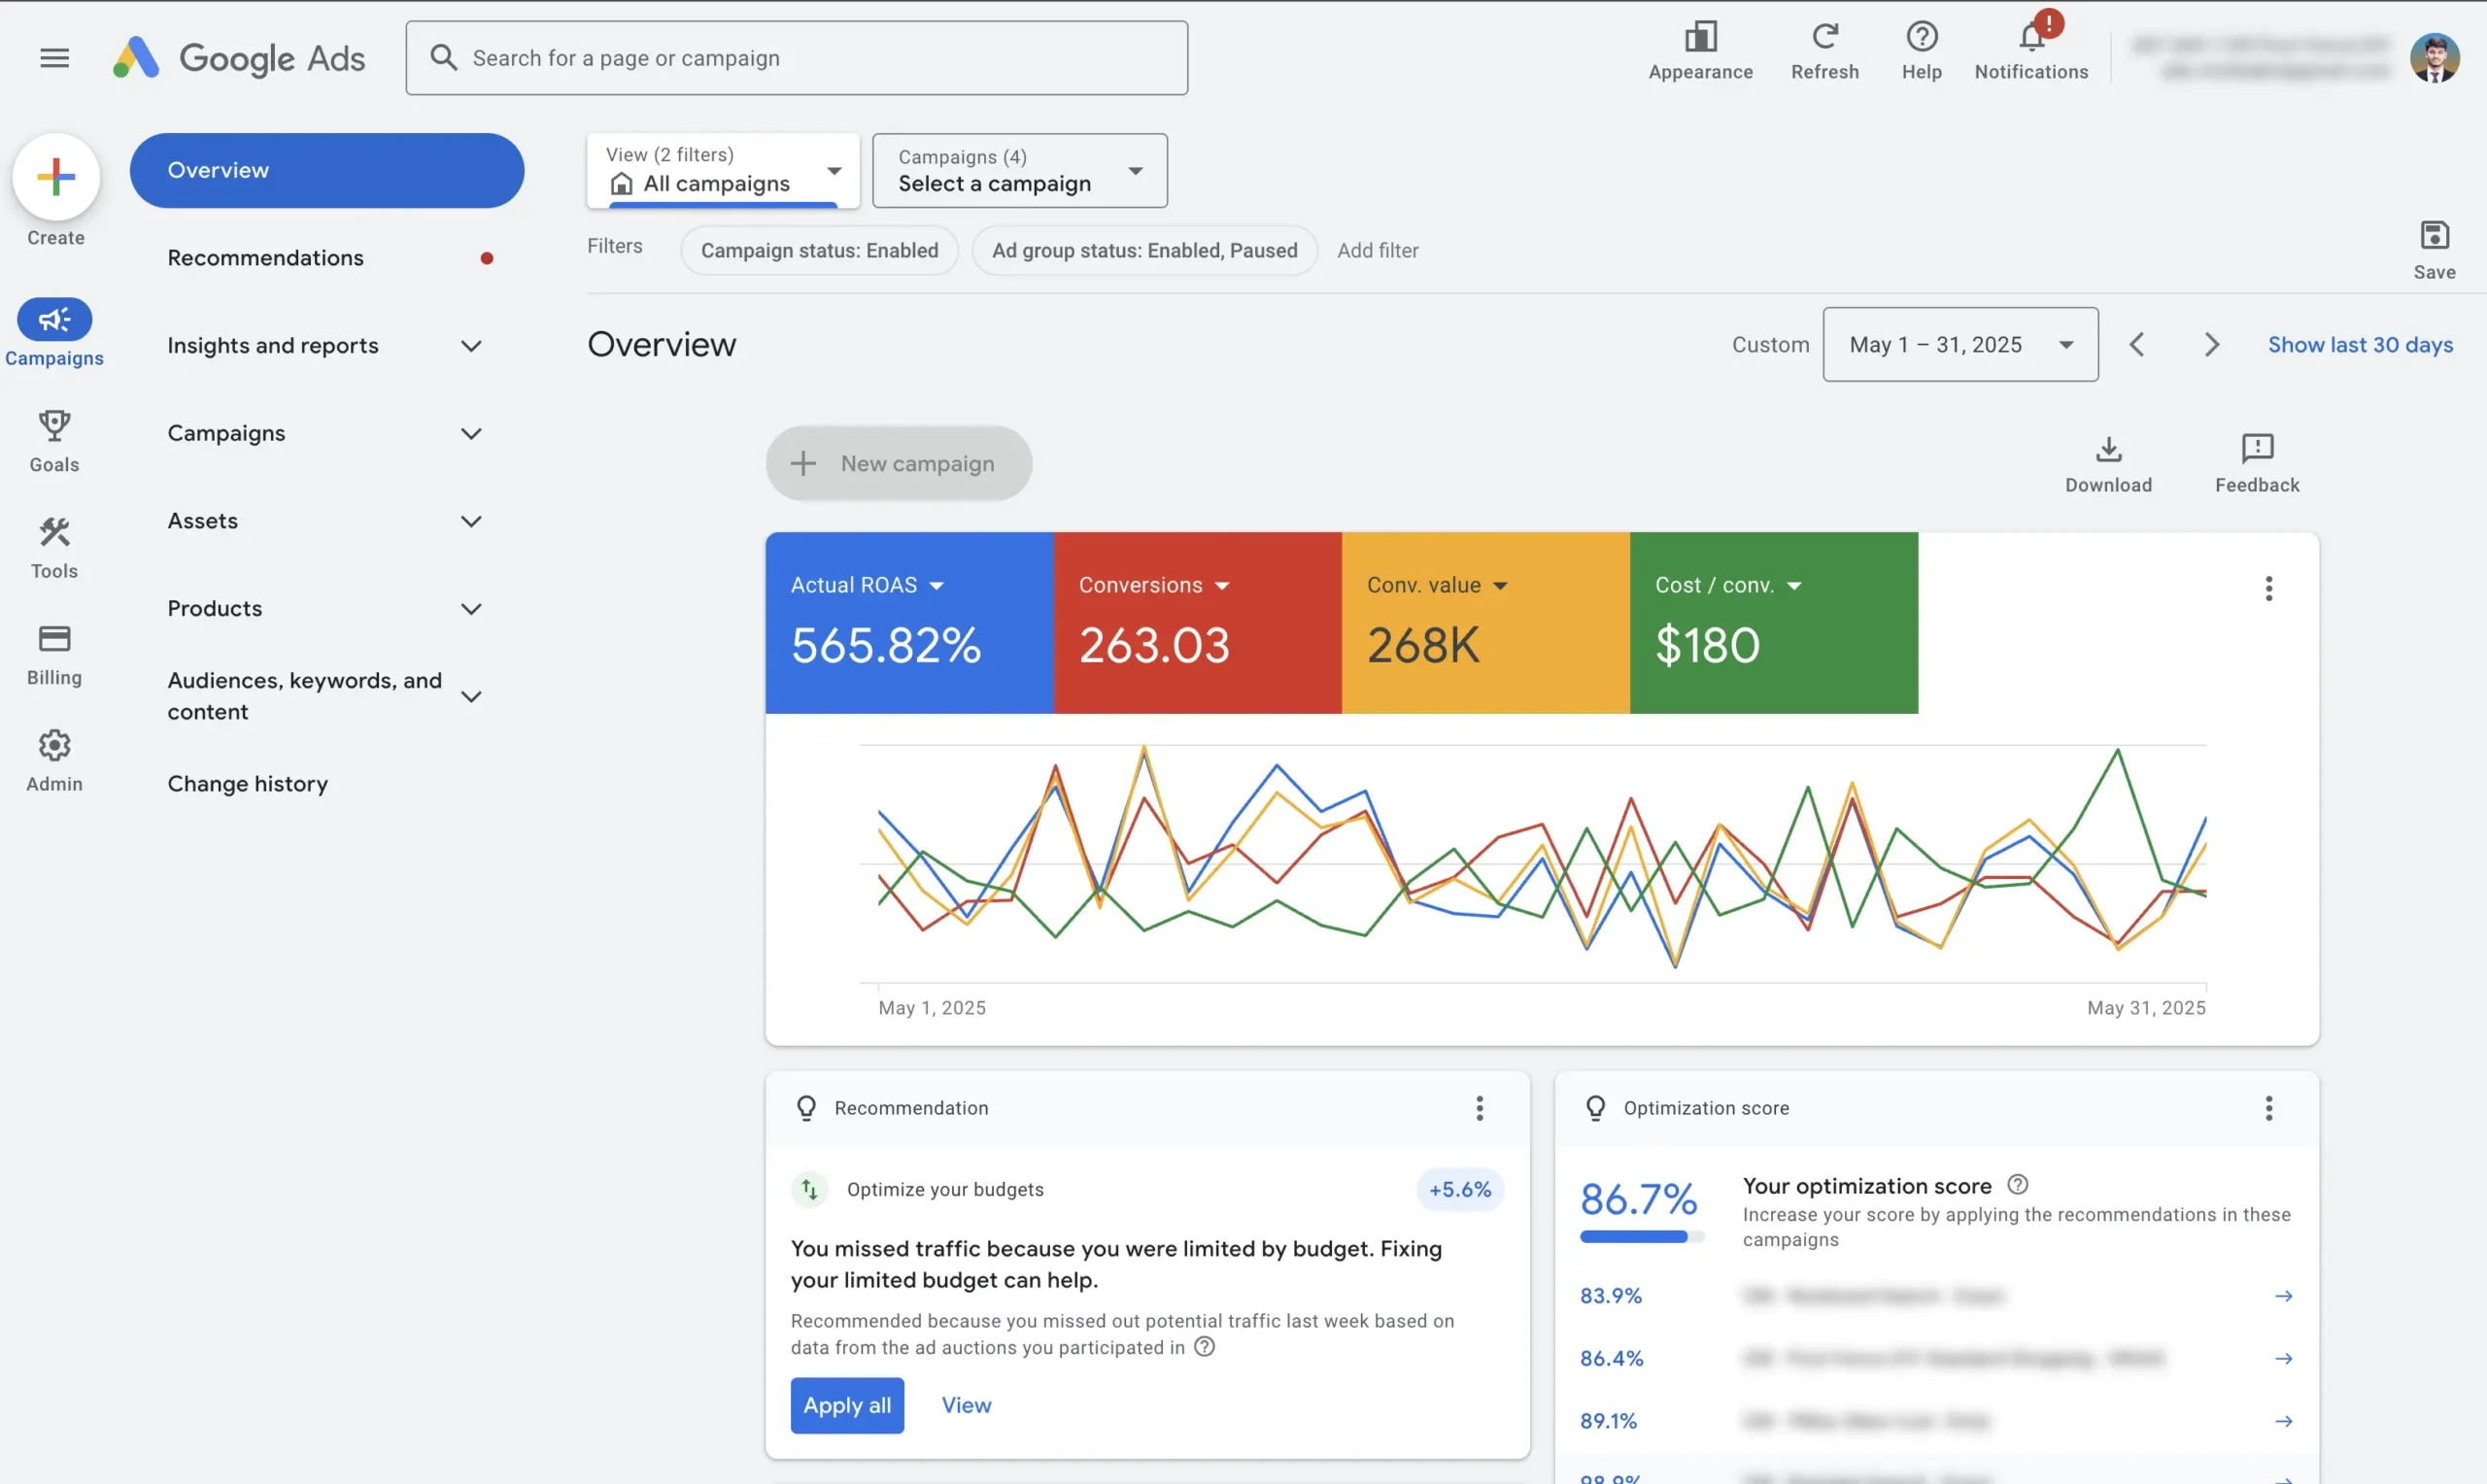
Conclusion: The Importance of Accurate Data
Accurate tracking isn’t just technical; it’s the foundation of profitable growth. As an ROI-Driven specialist, I see too many brands lose money due to bad data. If your pixel isn’t firing correctly because of the Additional scripts is deprecated update, you are flying blind, optimizing ads based on guesses rather than revenue.
Still Unsure? Let Me Audit Your Setup for Free
The Shopify Checkout Extensibility Update is mandatory, and ignoring it will hurt your marketing performance. If you don’t want to risk DIY errors or if you are seeing discrepancies in your data, let me take a look. I offer a complimentary audit to high-volume store owners to ensure your tracking is 100% accurate and ready to scale.